Here http://thelanguidlion.com/editable-personalized-notepad-tutorial/we have a wonderful Lady offering a free Editable notepad in which she's asked us not to mass produce but to be sure that we link back to her name and product with some elbow grease and at least as much thought as she has put into designing these free goodies for us. Geri also has a shop with lovely things inside, You should check it out.
Well since I am a Post Office worker and I appreciate hand written letters and communication with others the old fashioned way. I wanted to really Thank you Geri for offering these things online and keeping the eye to eye contact and formal lines of communication open. You even took the picture with Stamps!
Now to be sure, I am not very well educated with blogging and I'm not very popular, any help with etiquette would be greatly appreciated and I hope I did this right.
Pin IT

Saturday, April 20, 2013

Monday, March 25, 2013
Wednesday, February 27, 2013
A quilt for Baby


Sunday, September 30, 2012
Pillowcase dresses for Kiwi

Today I made this dress for my Granddaughter Kiwi. It's her Birthday soon and while I was packing up all of her wrapped presents I just couldn't bring myself to send it without a dress made by Grandma. I added an apron made from a thrift store find of a Queen sized eyelet lace bed ruffle...
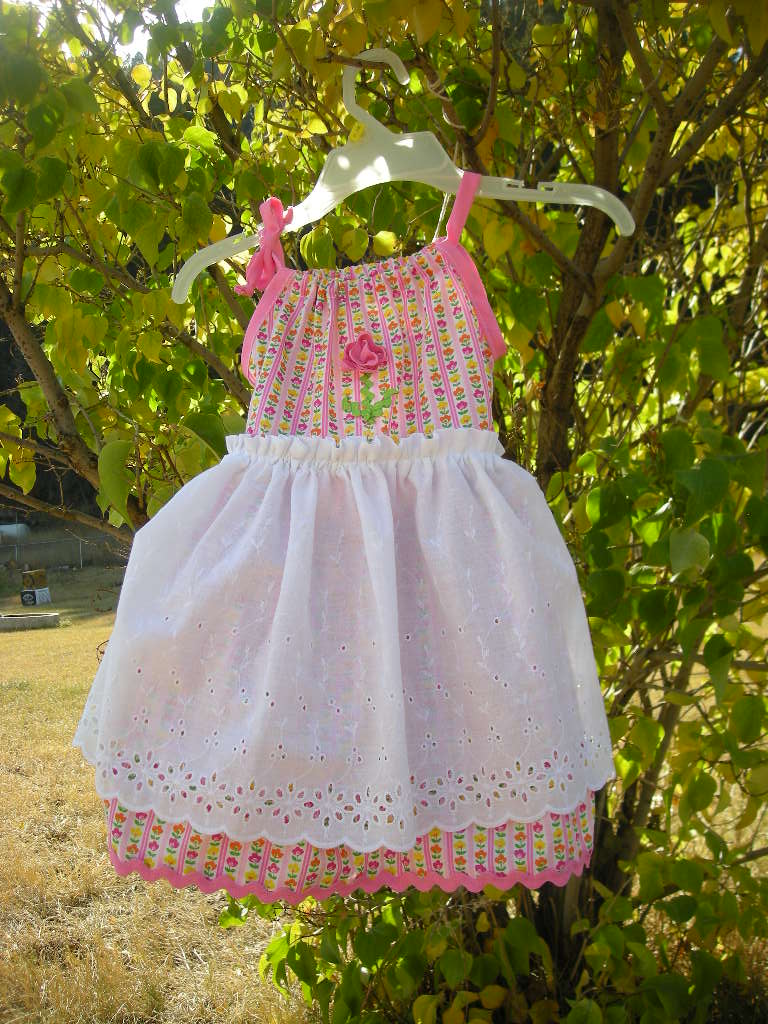
What a find! The bed ruffle was a buck, 1 dollar.....I've been making dresses and night gowns like crazy. And the apron can be used on her other dresses too like a pinafore.
Kiwi loves Rapunzel so I used heat-n-bond, cut her out and ironed her on.

Tuesday, August 28, 2012
First place Champion Ribbon at the County Fair

 I was so excited when I walked into the arts, crafts, and needlework building at our County fair and my Husband noticed that I had gotten this First place Champion ribbon for my embroidery quilt that I blogged about here. The ladies had such nice comments and invited me to join their quilt guild. It was so much fun to see all of the winners at our County Fair. Thank you again Clara & Jennie for hosting such a wonderful Quilt Embroidery Along, this was my first embroidery and they said that it was very well done.
Thursday, August 16, 2012
My Granny Square start

I am making my grannies out of Riley Blake's Marguerite fabrics. I have been coveting everyone's grannies for quite some time now so I am thrilled to be started on my own......I cant wait to see how the others turn out and I hope you enjoy seeing them too.


Wednesday, August 15, 2012
Sweet Critter Purses Tutorial

These were very fun and easy to make. I hope you can make yourself some for a very sweet critter lover in your family. The critters aren't any bigger than five inches big....I bought these (at the dollar store).
Purse Pattern:
Just cut the body fabric 17x11 inches and a piece of batting 17x5 inches.
2 bottom pieces with the corners rounded off at 8-1/4 x 3-1/4 inches with a piece of batting the same size. Then 2 straps at 9x3 inches to be folded in half width wise right sides together with a piece of batting 9x 1-1/2 inches....Sew straps right sides together and bottom right sides together with batting on the bottom and sew 1/4 inch around leaving space to turn right sides out....Use the great straw method to turn straps. Then you can sew your opening closed just by top-stitching close to the edge.
Now Here's the hard part.
Lay your body batting down. then lay your body piece down on top with right side facing up......I put mine on my mat so I could eyeball the middle....now lay down your ruffle, right side up. I bought one and made the others (not shown below) with 3 inch wide coordinating fabric, hemming and overcast stitching one long side and ruffling the other....Put ruffled edge on top edge of top of body fabric. Now keeping in mind that you'll be folding body fabric in half width ways and in half to make lining and front and back all in one. So, lay your straps at the top at 2-1/2 and 6-1/2 inches for one strap and the other goes at 10-1/2 and 14-1/2 there abouts....

I hope this tutorial is helpful, because I doubt its good instructions. Let me know how I can improve and believe me the way it turns out so cute and clean is all well worth it. Enjoy!

Subscribe to:
Posts (Atom)